
- San_Gerolamo--06142024-09
- San_Gerolamo--06142024-20
- San_Gerolamo--06142024-36
- San_Gerolamo--06052024-47
- San_Gerolamo--06052024-46
- San_Gerolamo--06052024-42
- San_Gerolamo--06052024-39
- San_Gerolamo--06142024-10
- San_Gerolamo--06142024-17
- San_Gerolamo--06052024-40
- San_Gerolamo--06052024-41_edited
- San_Gerolamo--06142024-27
- San_Gerolamo--06142024-29
- San_Gerolamo--06142024-03
- San_Gerolamo--06142024-12
- San_Gerolamo--06142024-30
- San_Gerolamo--06142024-25
- 16_San Gerolamo Photos_Great Room
- 17_San Gerolamo Photos_Kitchen
- 18_San Gerolamo Photos_Kitchen
- 19_San Gerolamo Photos_Kitchen & Indoor Grill
- 20_San Gerolamo Photos_Dining Area
- 21_San Gerolamo Photos_Dining Area
- 22_San Gerolamo Photos_Forno Oven
- 23_San Gerolamo Photos_Media Room
- 24_San Gerolamo Photos_Media Room
- 25_San Gerolamo Photos_Powder Room
- 26_San Gerolamo Photos_Master Bedroom One
- 46_San Gerolamo Photos_Master Bathroom Four
- 45_San Gerolamo Photos_Master Bedroom Four
- 44_San Gerolamo Photos_Master Bedroom Four
- 43_San Gerolamo Photos_Master Bathroom Three
- 42_San Gerolamo Photos_Master Bathroom Three
- 41_San Gerolamo Photos_Master Bedroom Three
- 40_San Gerolamo Photos_Master Bedroom Three
- 39_San Gerolamo Photos_Master Bedroom Three
- 38_San Gerolamo Photos_Master Bathroom Two
- 37_San Gerolamo Photos_Master Bathroom Two
- 36_San Gerolamo Photos_Master Bathroom Two
- 35_San Gerolamo Photos_Master Bedroom Two
- 34_San Gerolamo Photos_Master Bedroom Two
- 33_San Gerolamo Photos_Master Bedroom Two
- 32_San Gerolamo Photos_Master Bathroom One
- 31_San Gerolamo Photos_Master Bathroom One
- 30_San Gerolamo Photos_Master Bathroom One
- 29_San Gerolamo Photos_Master Bedroom One
- 28_San Gerolamo Photos_Master Bedroom One
- 27_San Gerolamo Photos_Master Bedroom One
- 47_San Gerolamo Photos_Master Bedroom Five - Living Room
- 48_San Gerolamo Photos_Master Bedroom Five - Living Room
- 49_San Gerolamo Photos_Master Bedroom Five - Living Room
- 50_San Gerolamo Photos_Master Bedroom Five
- 51_San Gerolamo Photos_Master Bedroom Five
- 52_San Gerolamo Photos_Master Bedroom Five
- 53_San Gerolamo Photos_Master Bathroom Five
- 54_San Gerolamo Photos_Master Bathroom Five
- 55_San Gerolamo Photos_Master Bathroom Five
- 56_San Gerolamo Photos_Master Bathroom Five
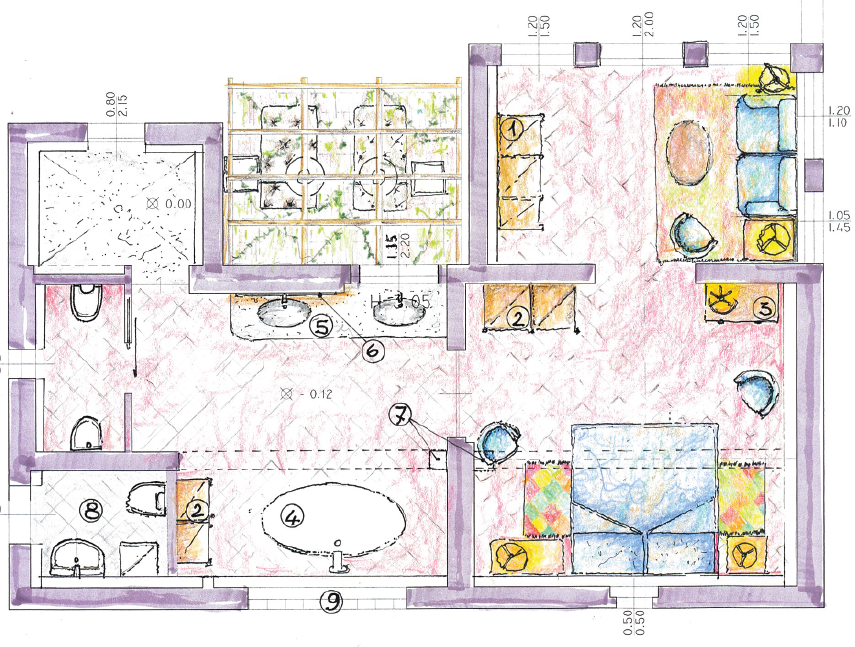
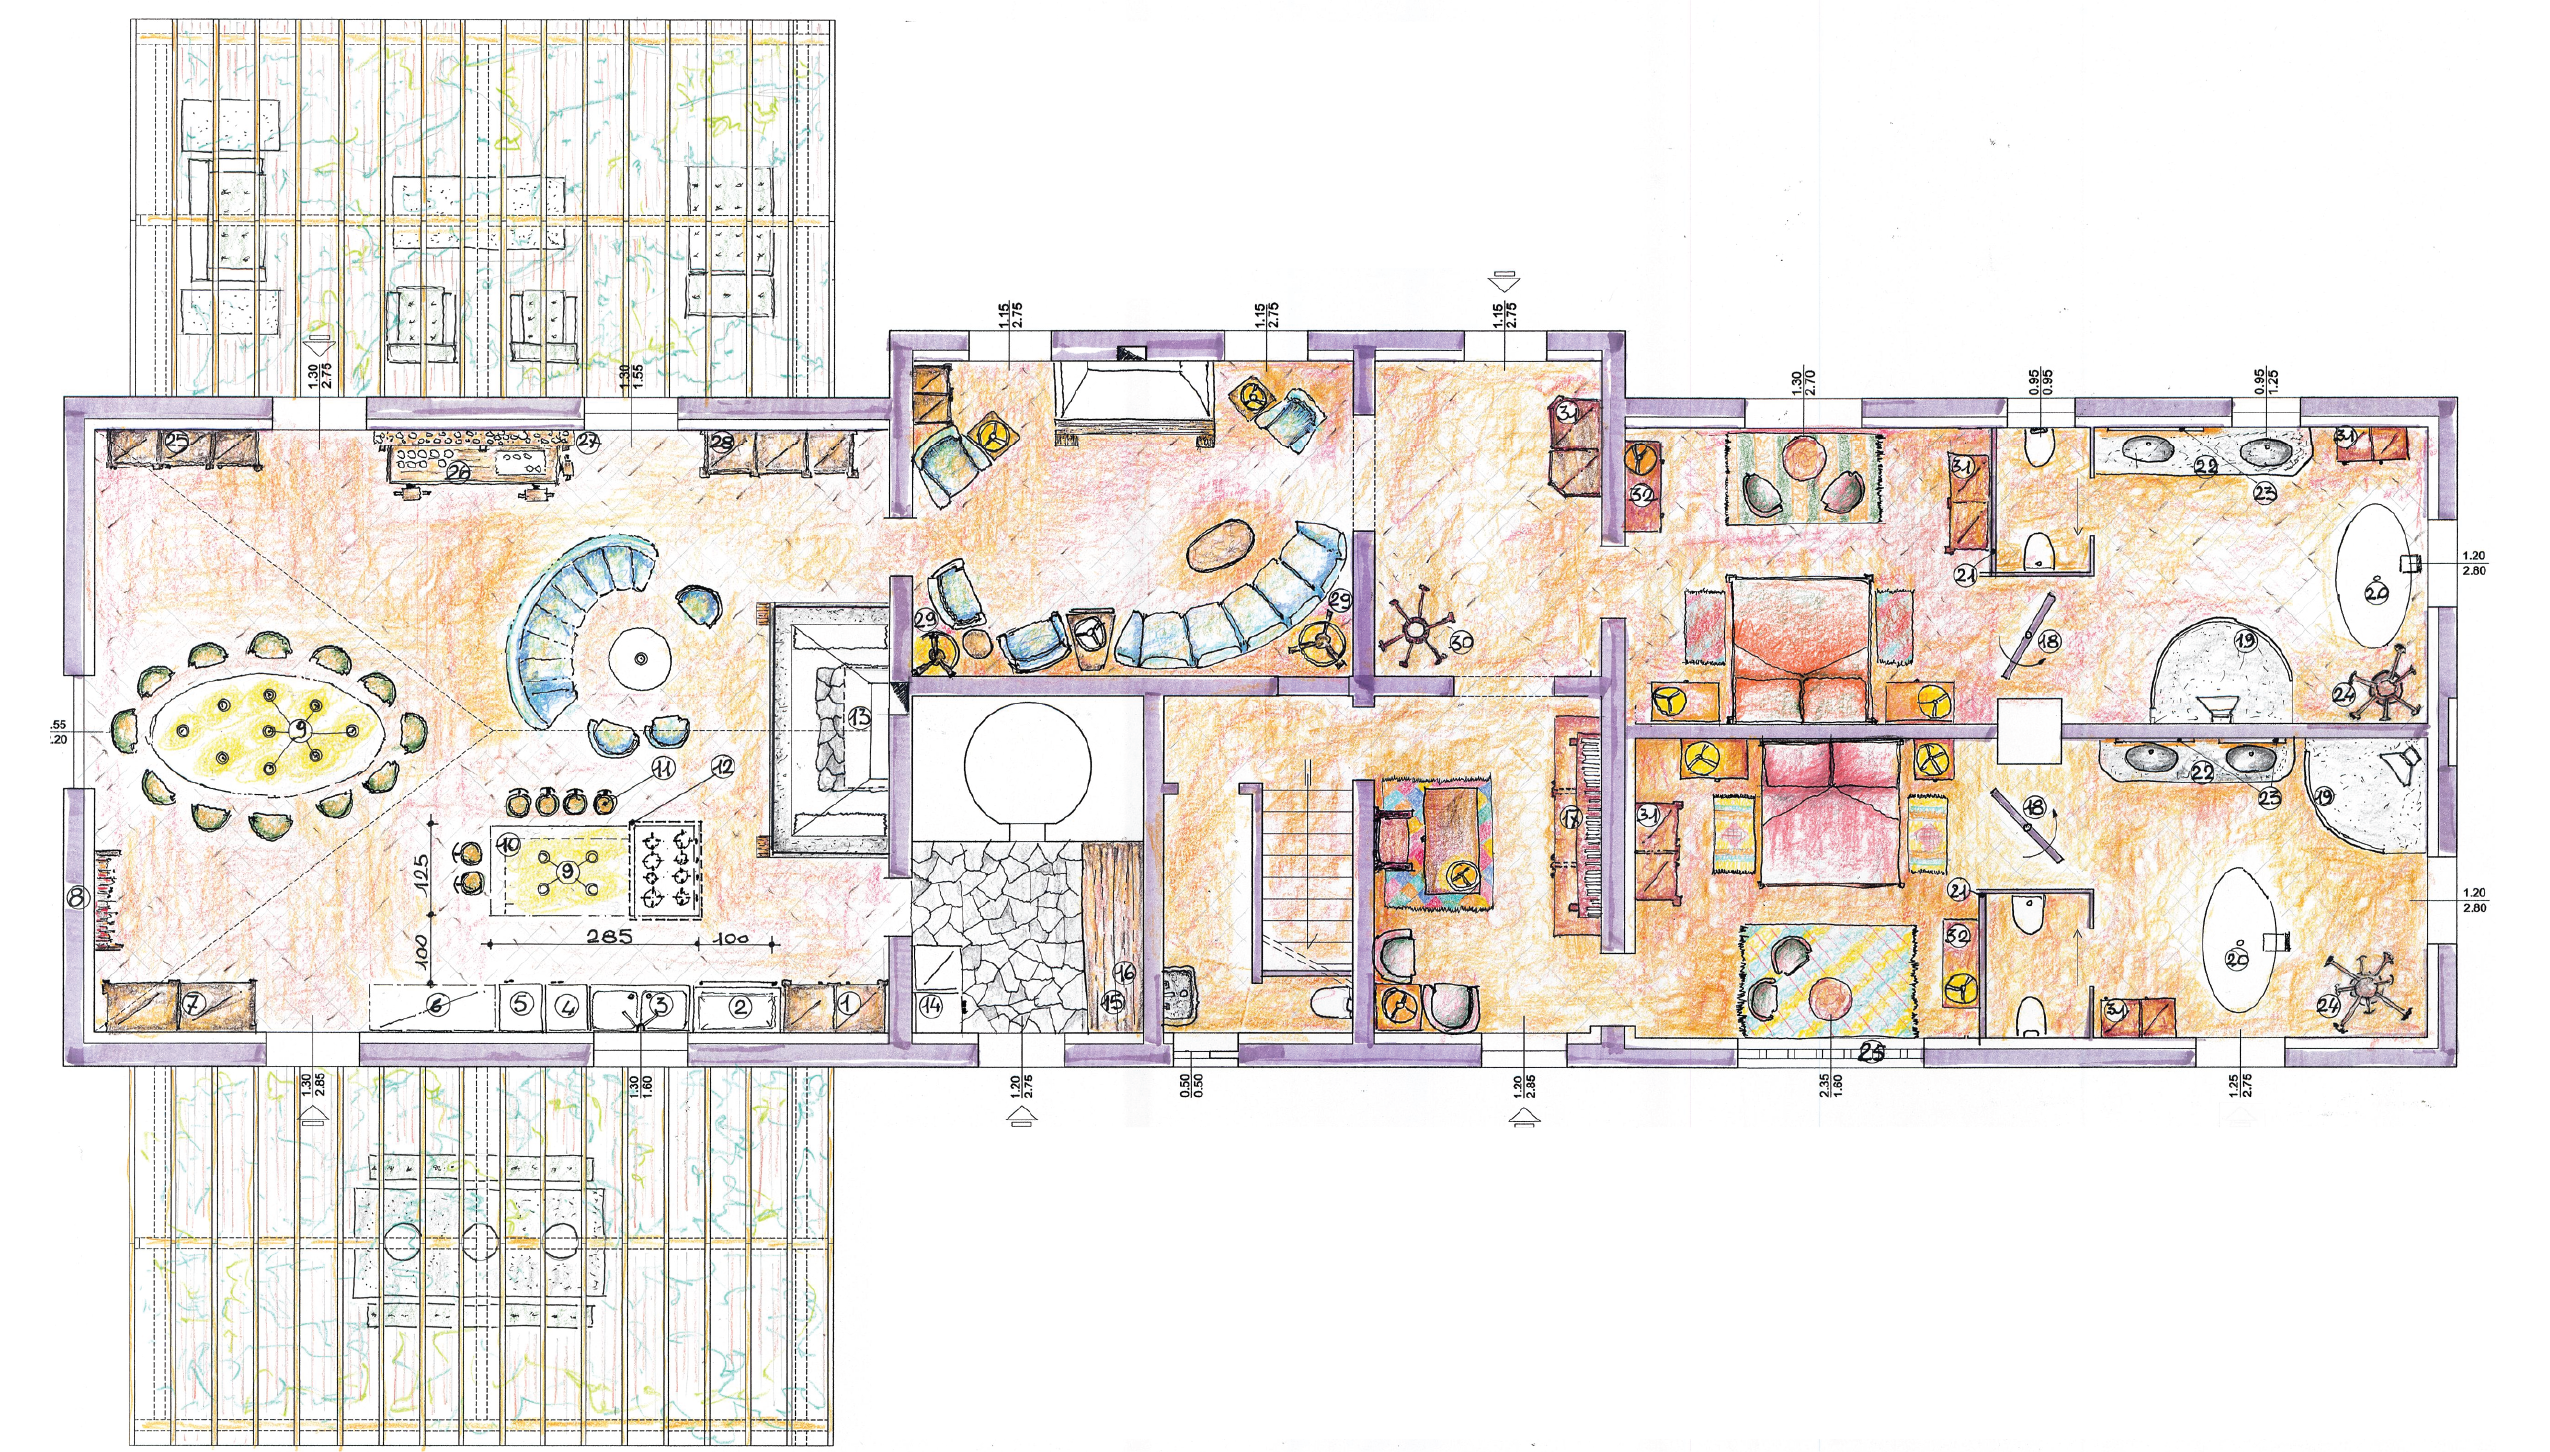
- San Gerolamo Floor Plans
- San Gerolamo The Estate
- San Gerolamo Annex
- San Gerolamo Main Floor
- San Gerolamo Site Plan
- San Gerolamo Upper Floor